

Split Testing With Netlify
Split testing is a feature you aren't using enough. It's a great way to test changes with your visitors without minimizing risk.


Split testing is a feature you aren't using enough. It's a great way to test changes with your visitors without minimizing risk. In this tutorial, we'll learn what split testing is, why you need it, and how to set it up with Netlify.
What is Split Testing?
Split testing is the idea of creating another copy of your website that you can send users to, so you can test new features. Let's say you have a new design you want to try out. Rather than push that new design to production where everyone can see it, you can test it with a few people.
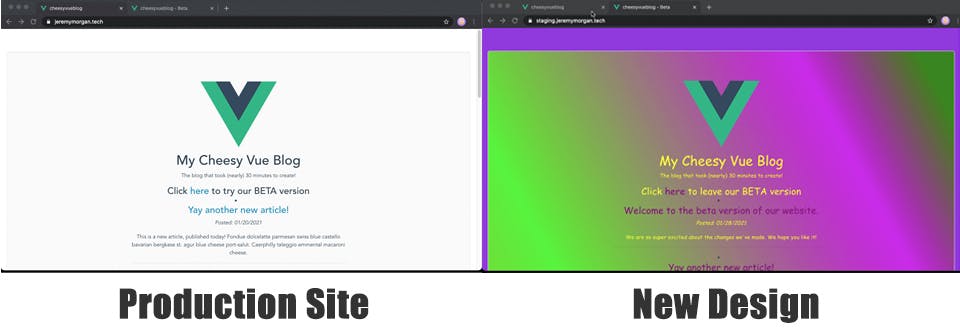
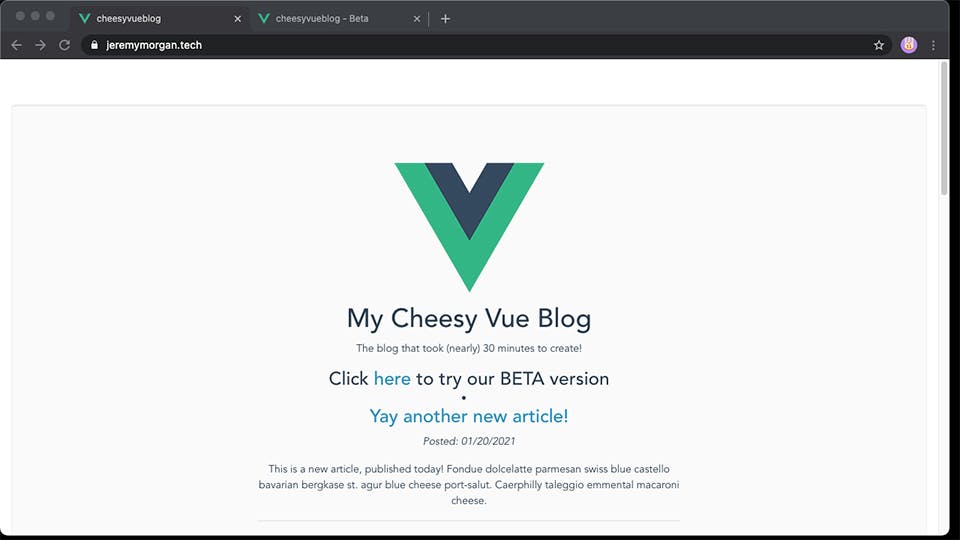
Here I have redesigned my awesome Vue blog. But I don't want to dump the new design on everyone. I want to test it out. Here are the options I can do with split testing:
I will keep the main production site with the current (light colored design). Then I can:
- Only send people I invite to the (private) beta site
- Have folks "opt in" to the beta site
- Push a certain amount of (public traffic) to the beta site
These are all ways I can test the design without fully committing. If there are major problems with the site, I'll find them and fix them before everyone sees it.
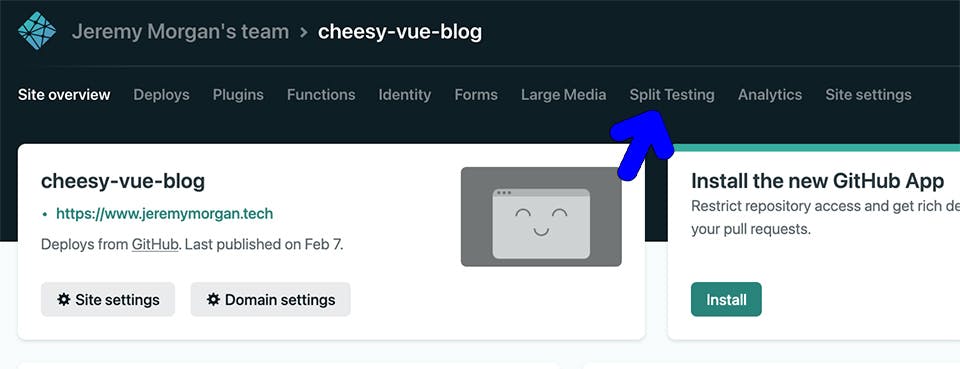
Enable Split Testing
The first thing I have to do is enable split testing with Netlify. To do that, I must:
- Create a new branch in git with the new design
- Enable branch subdomains in Netlify
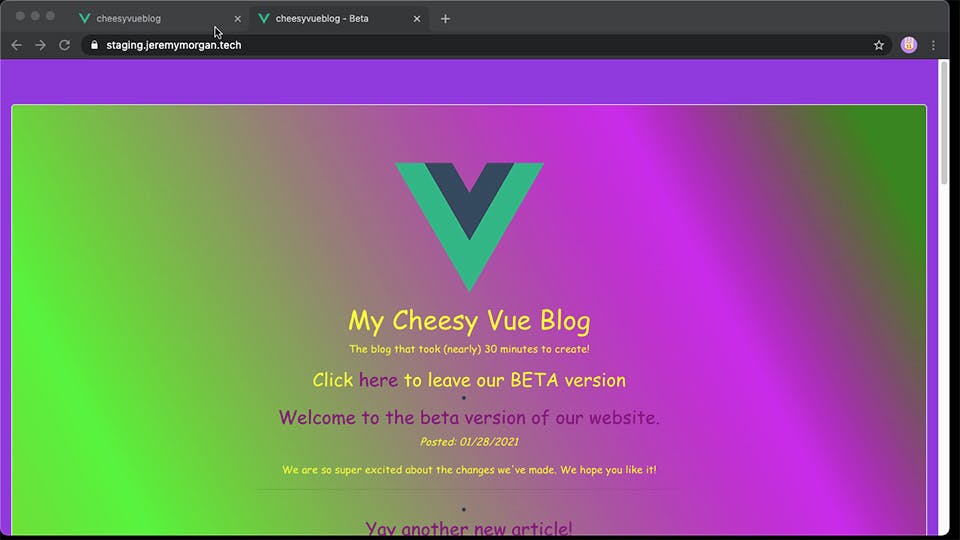
Once you have created a new branch (name it whatever you like) you can push the new design to that branch. I have mine setup at staging.jeremymorgan.tech.
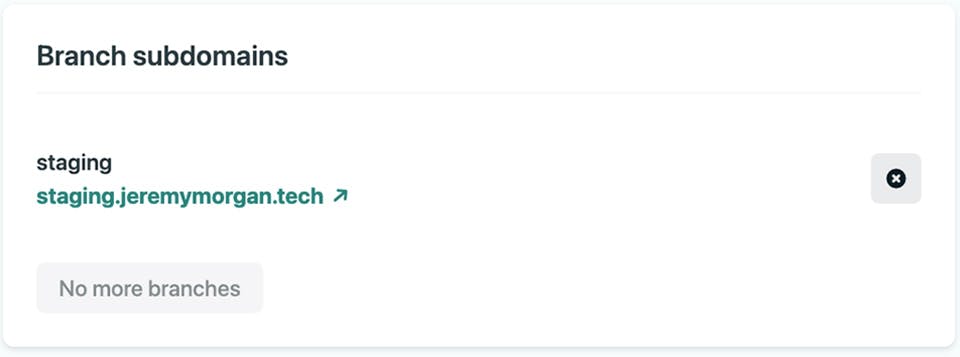
If you enable branch subdomains, you'll see a split testing tab in Netlify:
Option 1: Invite Only (Private Beta)
You enable invite only once you've enabled branch subdomains. Your main traffic goes to your production site:
jeremymorgan.tech
And you can send testers to the branch subdomain:
staging.jeremymorgan.tech
Easy stuff. You gather feedback, make changes and when your site is ready to go, you merge the branch.
Option 2: Opt In (Semi Private Beta)
Let's say you want to make so folks can opt into a beta if they want to, and if not they stay on your production site.
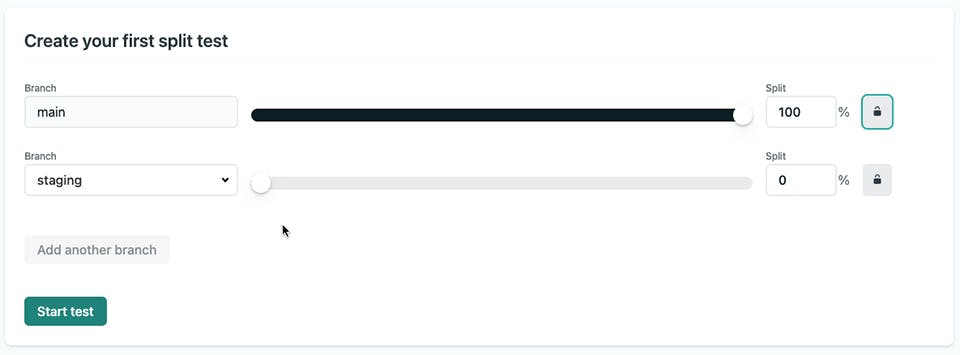
To do that, you create a split test, and set 100% of your traffic to production, and 0% to the new beta site:
Now, to route people to the beta site, they will need a cookie set. Netlify uses the nf_ab cookie. If the nf_ab cookie is set to the name of the subdomain, Netlify will route the user to that branch subdomain:
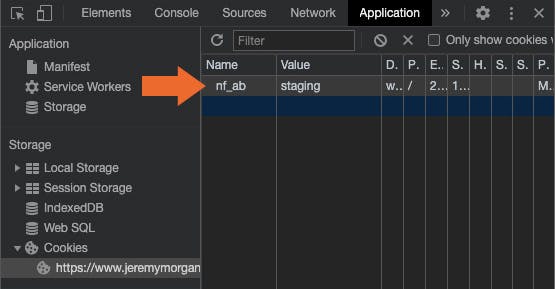
So as long as the cookie is present, they will see the new version of the website (available on the stage subdomain).
For example, in my Vue App, I added a button:
<h3>Click <a href="#" v-on:click="gobeta">here</a> to try our BETA version</h3>
Which calls this method:
gobeta: function(){
alert("We are going beta!");
VueCookies.set(‘nf_ab’, "staging", "24h");
}
This code sets the cookie for anyone wanting to "try out" the beta version of the site. The "opt in" model is great for your website visitors who are feeling adventurous and want to try out your new site. You leave the production site intact for everyone else.
Option 3: Split Traffic (Public Beta)
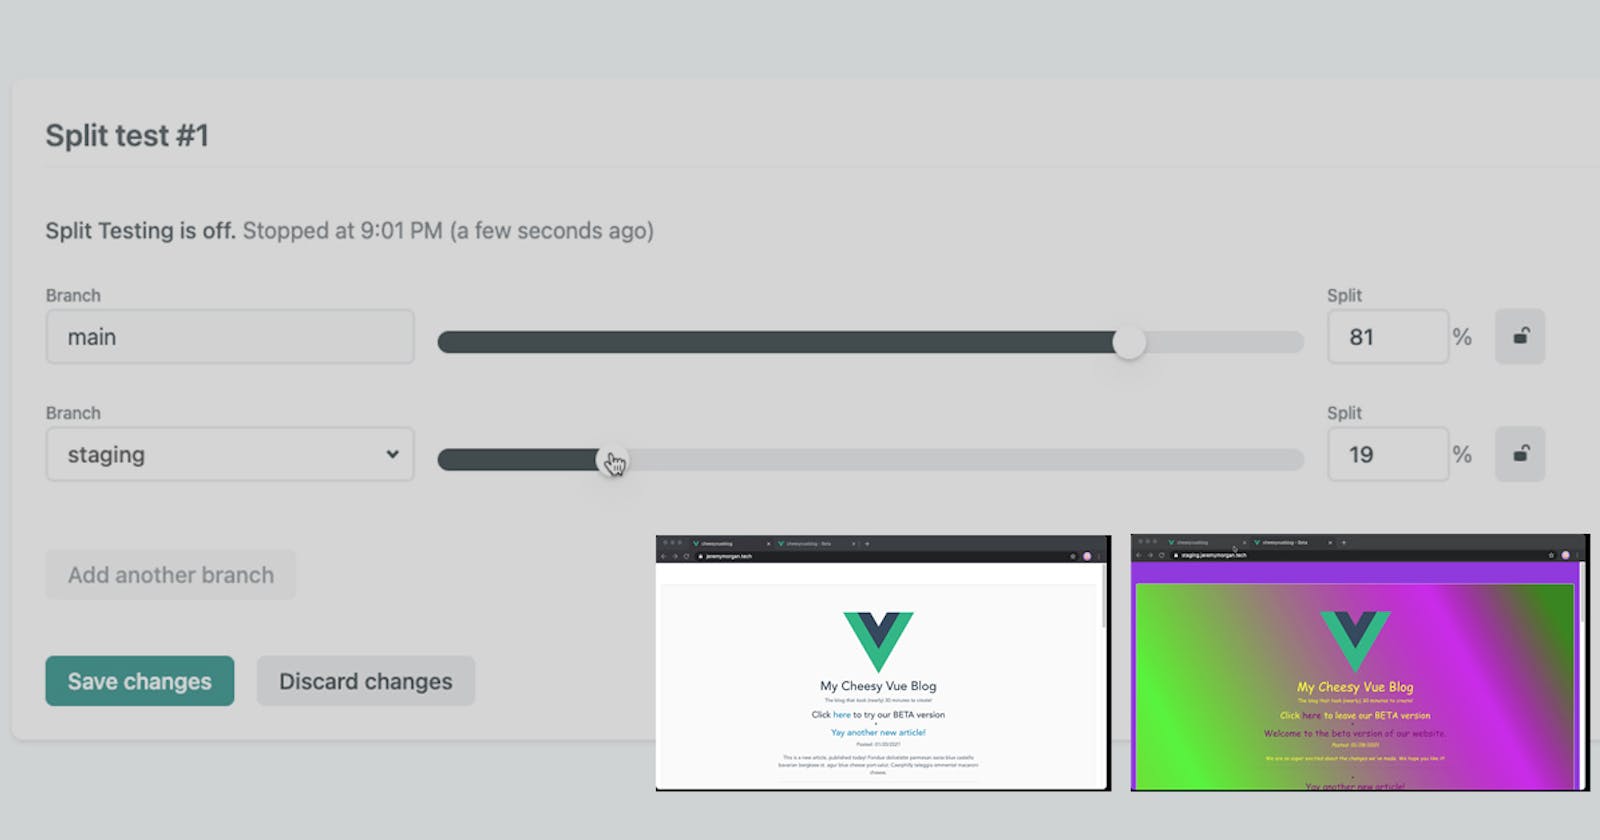
So if you've created a new design or new features, and you want to "ease into" deploying them, this is the way to go. In the Netlify split testing panel, simply choose a number of people to send to the new site:
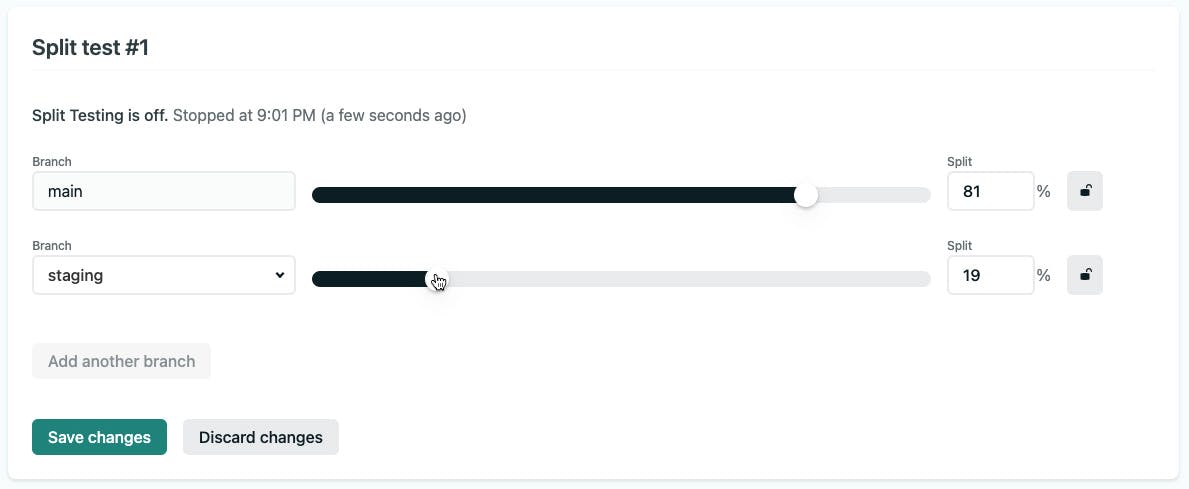
In this example, we're sending 19% of the total public traffic to the new website. This is random, and it could be anyone. Netlify will send a percentage of your visitors to your new site and the rest to your old or "production" site. No need to worry about visitors getting a new site one day and the old one the next. Netlify will use the nf_ab cookie again to route users to the original site they visited.
This is an excellent way to push out some fresh changes, look for feedback, and react. You can even set up a Blue-Green Deployment with this.
Try Out Split Testing For Yourself!
Split testing is an excellent way to test out new features without rolling the dice on a full deployment. Sometimes you want to test a new design, a new feature, or do some A/B testing for advertising. These are all possible with Netlify's split testing feature. The best part is, it's easy to set up. You create a new branch, point a subdomain to it, and start tinkering.
Netlify makes this testing simple and easy to implement. Check it out! Questions, comments? Let me know!